There are numerous reasons that you may want to change your name on Facebook. You could possibly have outgrown a nickname and be ready for a change. Maybe you recently got married and you’re trying to change your surname, or maybe you just want to change things up.
Either way, no matter what your reason is for changing your name on Facebook, just follow the steps below to start making changes:
How to change your name on Facebook:
Step 1: Log in to Facebook.
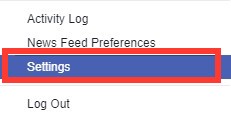
Step 2: Click the drop down arrow located in the top right corner of your screen.

Step 3: Click on settings, located towards the bottom of the drop down menu.

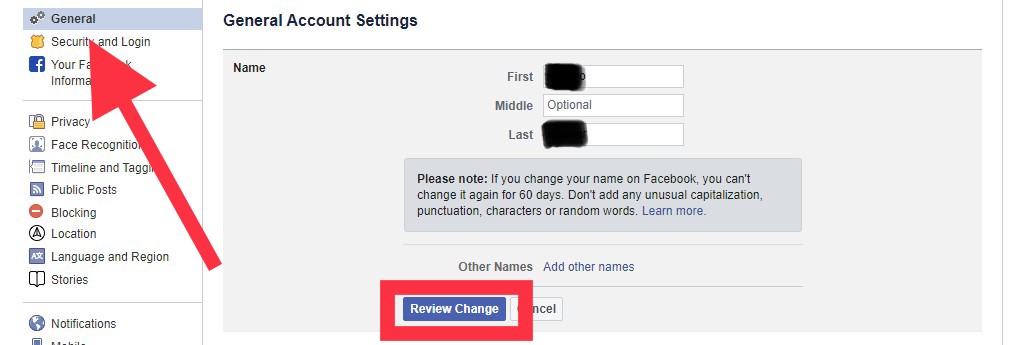
Step 4: On the left hand column, you will see ‘General’.

Step 5: Click on ‘Name’ and enter your new name.
Step 6: Click on ‘Review Changes’.

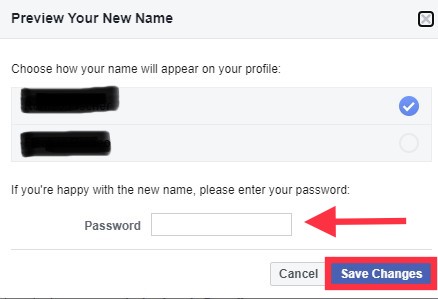
Step 7: Enter your password and click ‘Save Changes’.
Tip: Make sure to read Facebook’s name standards to make sure you are following the proper guidelines.
Reminder: Once you change your name on Facebook, you will not be able to edit it again for at least 60 days. Don’t use any random words, characters, or any unusual capitalizations or symbols.


